One of Montgomery’s myths was that everything at Alamein went according to his plan and that General Sir Harold Alexander played little or no part in the battle. However, the reality was that the Commander-in-Chief had a huge part to play not just in the political-strategic domain, but also at the tactical level.
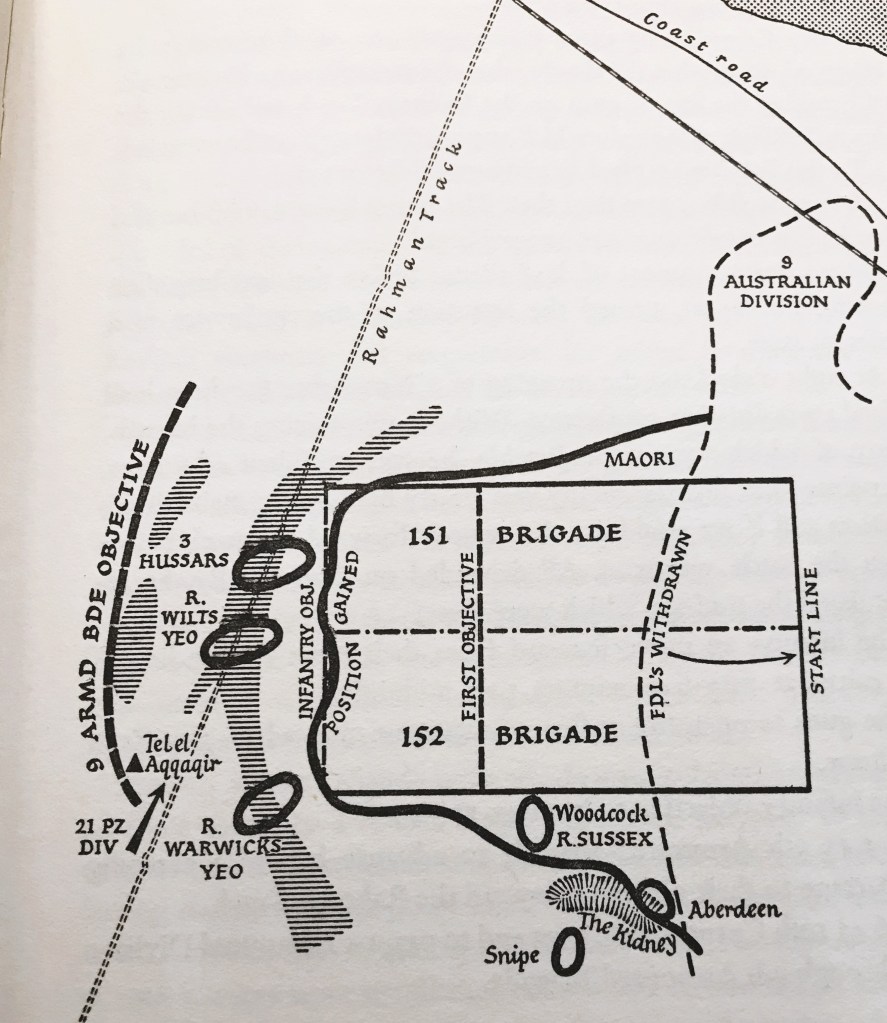
After a week of fighting, Monty intended to push his second phase (Operation Supercharge) through the Australian Division on the north coast. However, Alexander intervened and persuaded him to change his point of attack by focusing on the feature known as Kidney Ridge, where the commanding officer of the Rifle Brigade, Vic Turner had just earned his Victoria Cross. Early in the morning of the 2nd November, a mixed infantry force from the Durham, Highland and Maori Brigades punched a hole through the enemy line and made space for 9th Armoured Brigade to advance at first light.
Unfortunately, this spearhead brigade, made up of The King’s Own Hussars, the Royal Wiltshire Yeomanry and the Warwickshire Yeomanry, became was not supported by the follow-up division. The daylight battle resembled Balaklava, but the isolated Brigade Commander, John Currie did not give up and despite losing 102 of 128 tanks and 229 soldiers, he drew in Rommel’s reserves and won a famous victory at Tel el Aqqaqir.
Montgomery later wrote: “If the British armour owed any debt to the infantry of the Eighth Army, the debt was paid on November 2 by 9th Armoured Brigade in heroism and blood.” There was still much hard fighting to do for 1st Armoured Division as they battered away at 15th and 21st Panzer Divisions, but gaps now appeared in the Axis lines and Montgomery showed great skill in directing his troops through these breaches.
9 Armoured Brigade’s Moment In History